XYZ Protect is a WordPress plugin that prevents unauthorized access to your media files — images, videos, documents, and audio. Instead of serving your content directly from your WordPress uploads folder, XYZ Protect routes media through a secure delivery network powered by Cloudflare. Unauthorized visitors see a placeholder image instead of your actual content.
This guide walks through installing the plugin and setting up media protection on a standard WordPress site. Age verification configuration is covered in a separate guide .
Download and Install
Visit xyzinc.com/protect and click the download link. You'll be taken to the download page where the plugin file will download automatically.
Log into your WordPress admin dashboard and navigate to Plugins → Add Plugin, then click the Upload Plugin button at the top of the page. Select the plugin file you just downloaded and click Install Now. When the installation completes, click Activate Plugin.
Connect to the XYZ API
Once activated, you'll find the plugin settings under Settings → XYZ Protect.

The Connection & Status tab is where you'll connect the plugin to XYZ's API. Enter your email address and click Start Free Trial. Your free trial includes 10,000 protected media requests — enough to thoroughly evaluate the plugin on your site.
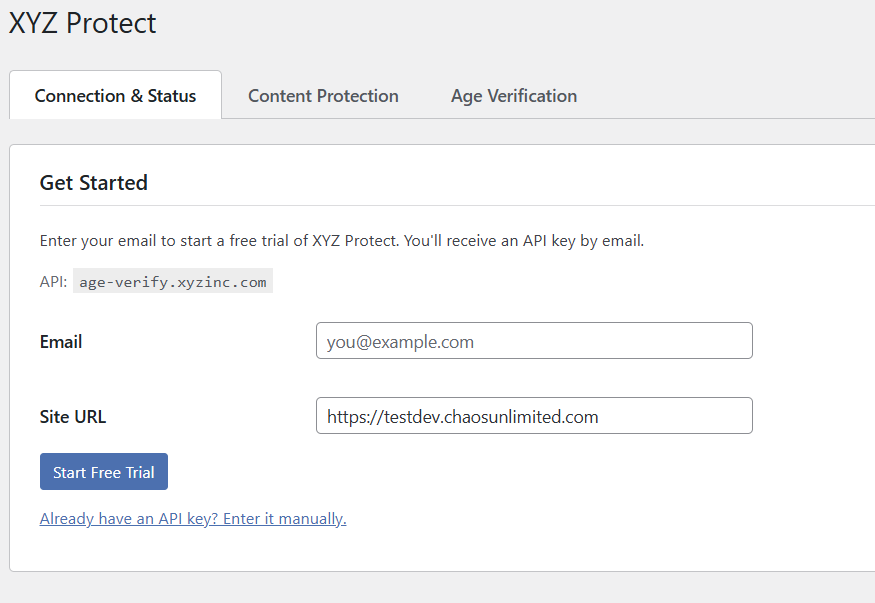
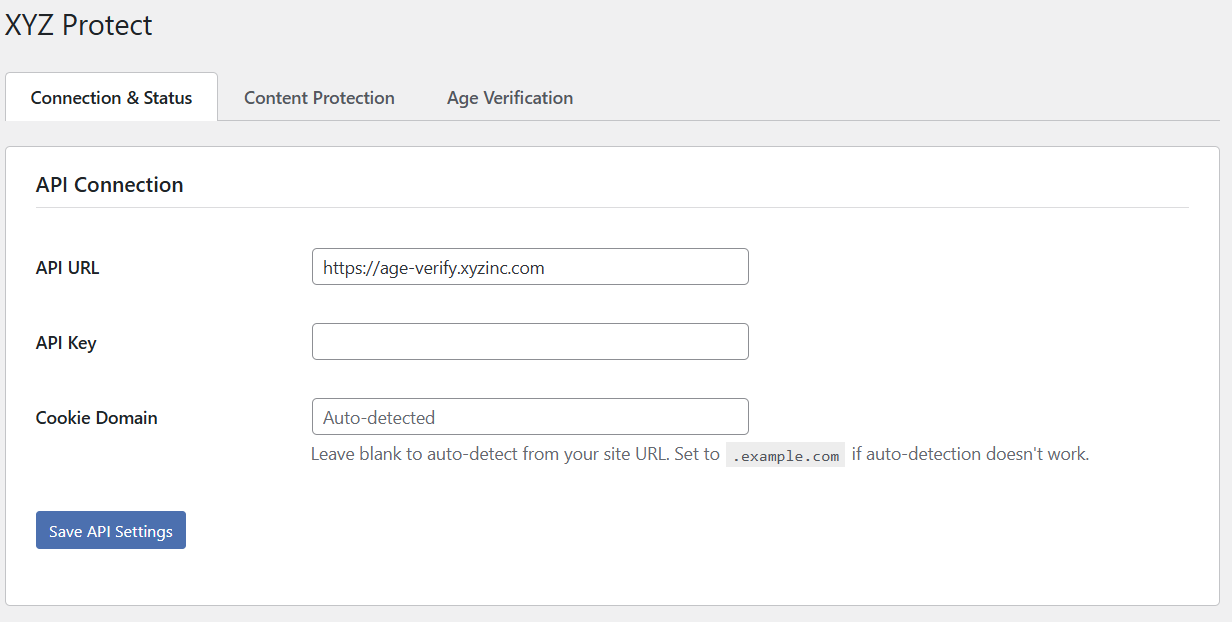
If you're a SaaS customer or agency that has already been provided an API key, click the "Already have an API key? Enter it manually." link to go directly to the API connection screen.
After submitting your email address, the plugin will prompt you to check your inbox.
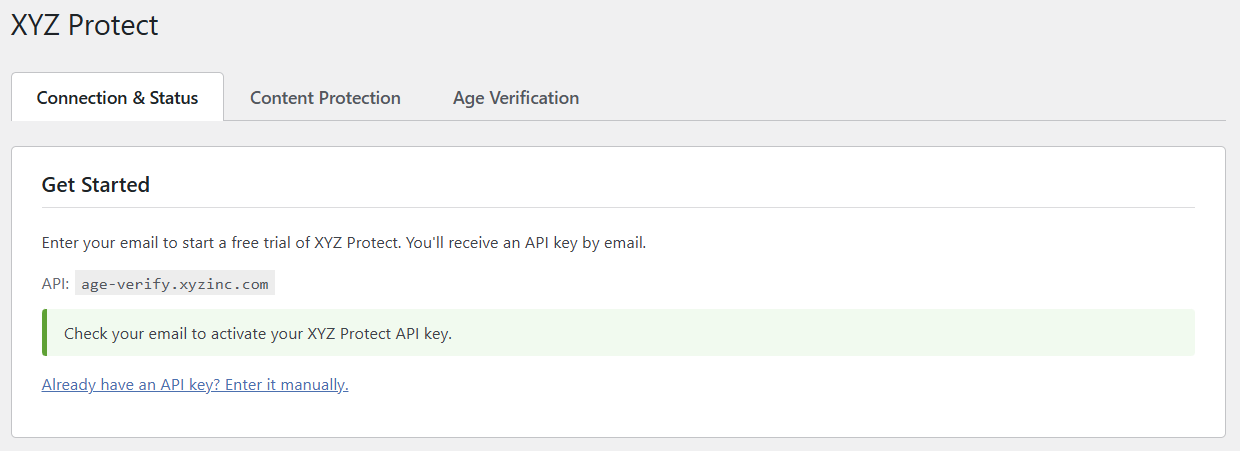
The confirmation email comes from [email protected] with the subject "Confirm your XYZ Protect free trial." The confirmation link expires in 24 hours.
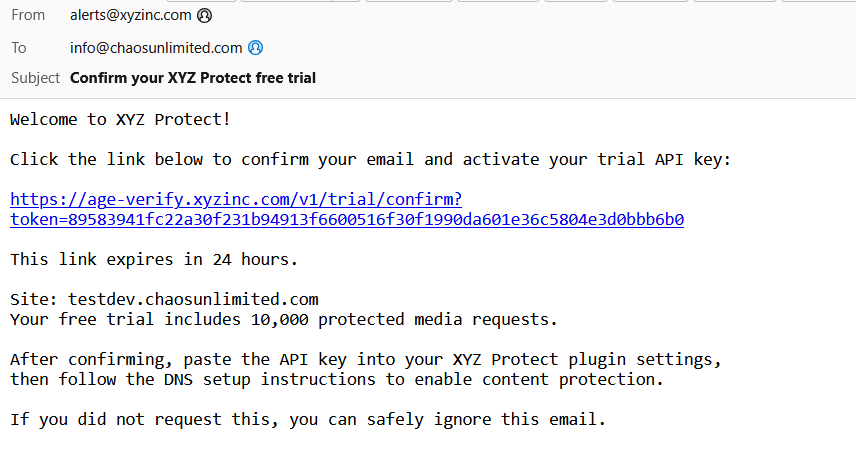
Clicking the link takes you to a page displaying your API key. Save this key somewhere secure — it is shown only once and cannot be retrieved later.
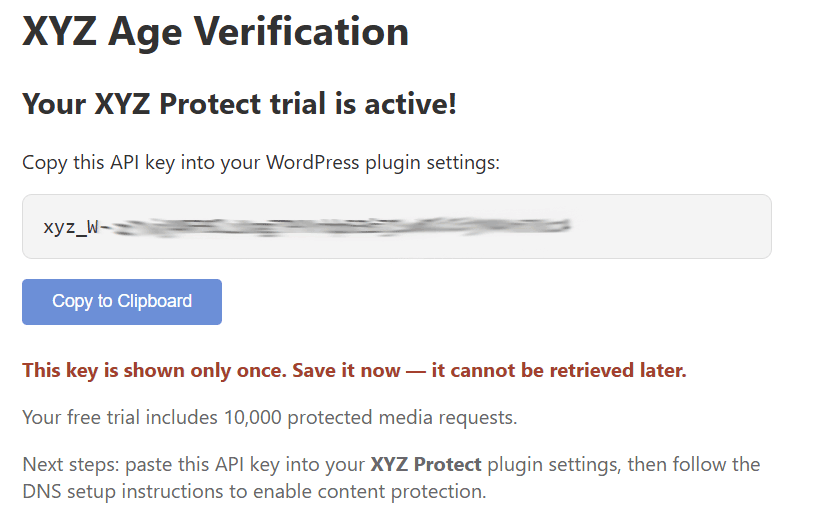
Return to your WordPress site and paste the API key into the API Key field on the Connection & Status tab, then click Save API Settings. Leave the Cookie Domain field blank — it auto-detects from your site URL.

Set Up the Secure Media Network
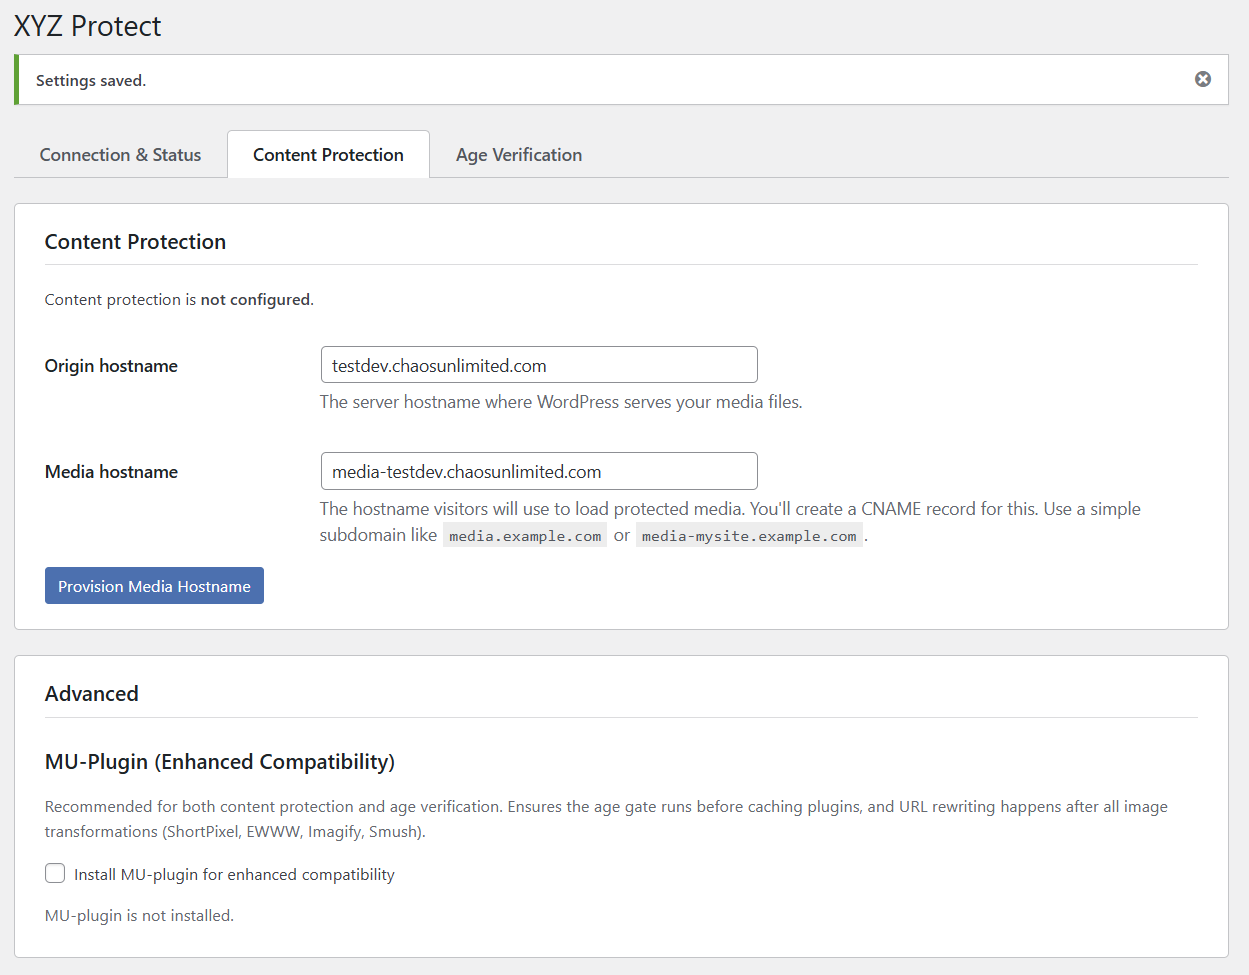
Click the Content Protection tab. You'll see two fields: Origin hostname (your WordPress server's domain) and Media hostname (the subdomain visitors will use to load protected media). The media hostname defaults to media-yoursite.yourdomain.com — you can change this to any subdomain you prefer, such as media.yourdomain.com or cdn.yourdomain.com.
At the bottom of the Content Protection tab you'll also see the Advanced section with the MU-Plugin option. We'll come back to that after provisioning. Click the Provision Media Hostname button to begin.
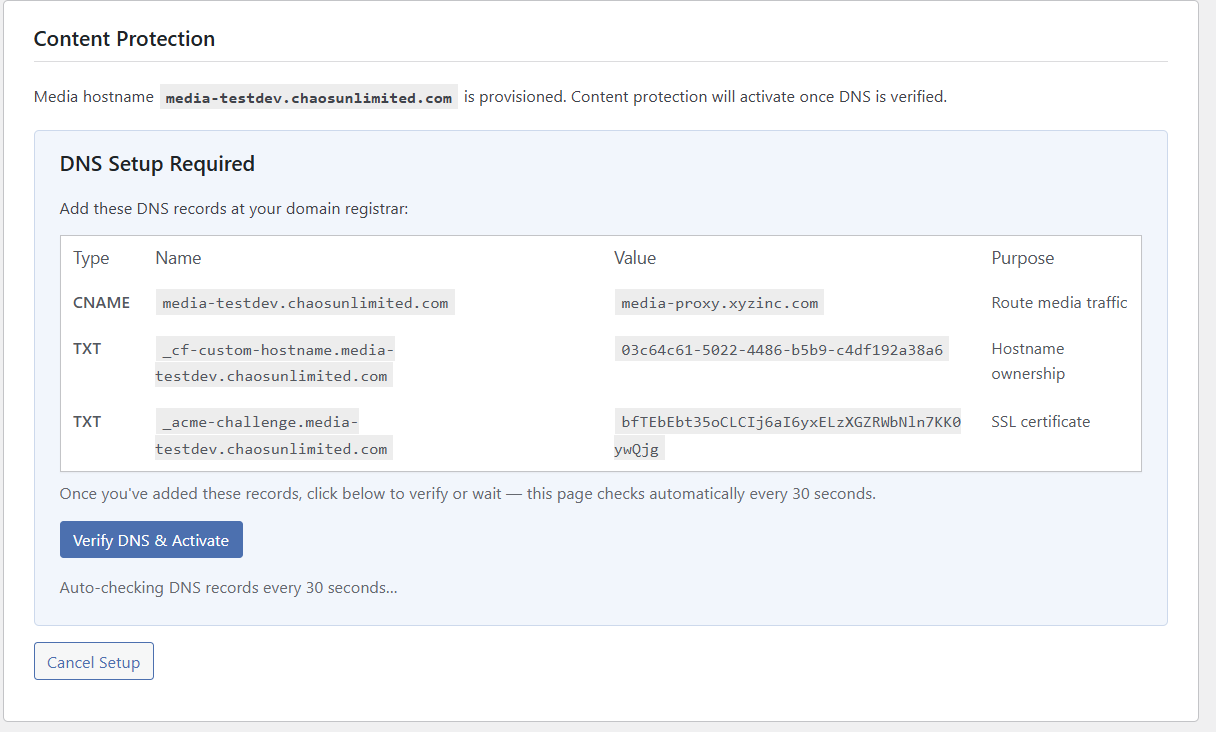
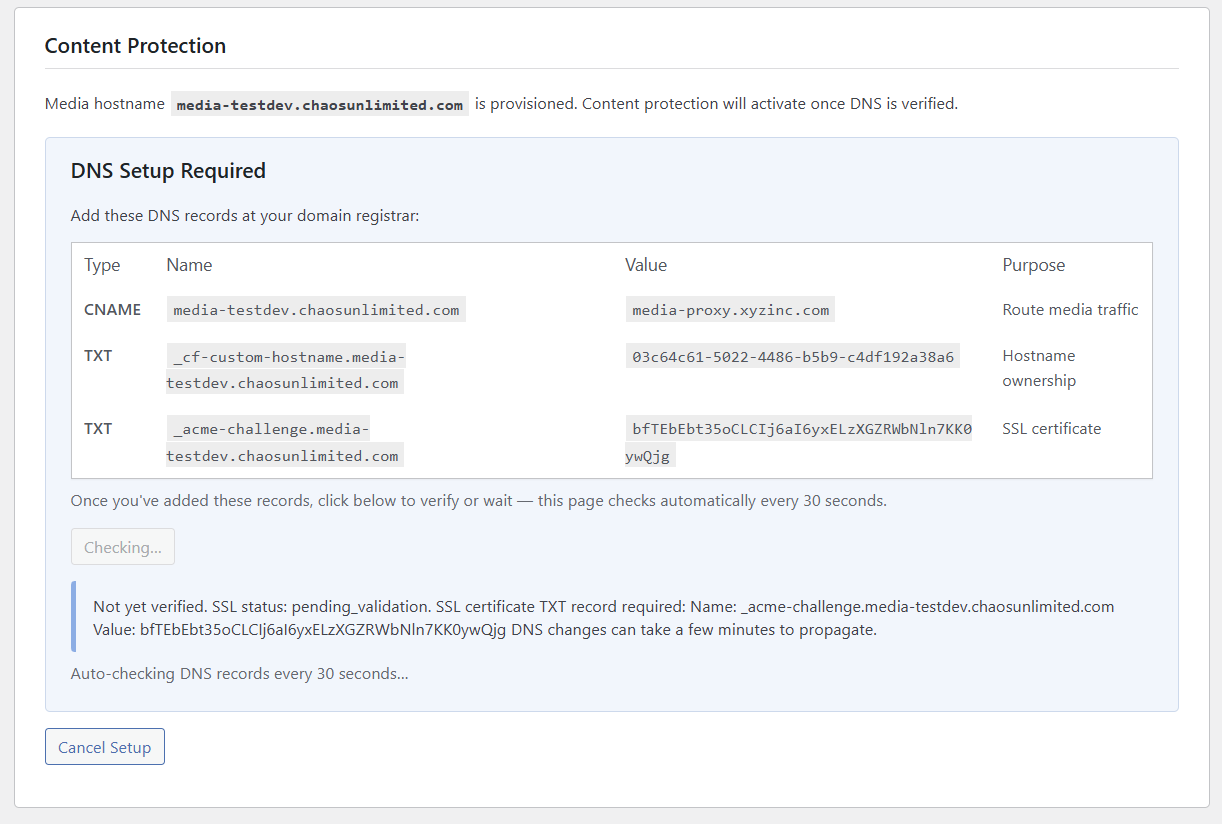
The page will refresh and display the DNS records you need to add at your domain registrar or DNS hosting provider: one CNAME record that routes media traffic through XYZ's protection network, and two TXT records for hostname ownership verification and SSL certificate provisioning.
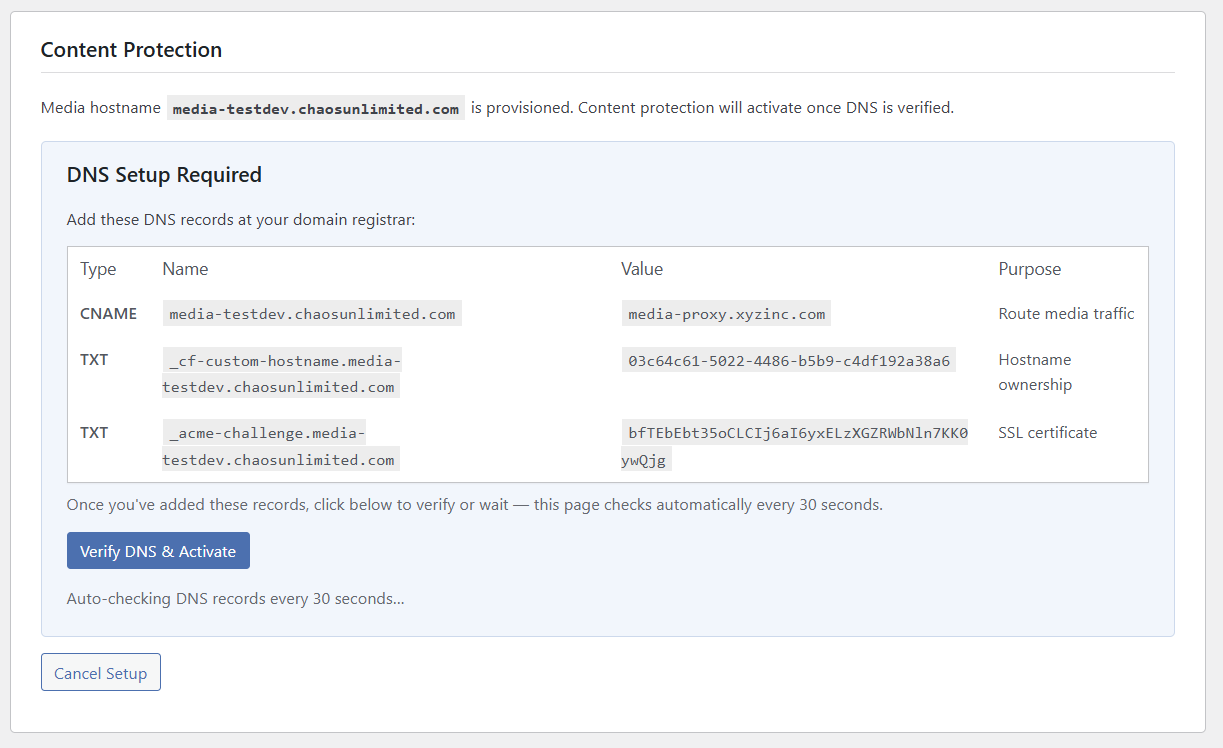
You'll need to add these three records at your DNS provider. The exact steps vary by provider (Cloudflare, Namecheap, GoDaddy, Route 53, etc.) — consult your provider's documentation for instructions on adding CNAME and TXT records.
The plugin automatically checks for DNS propagation every 30 seconds. You can also click Verify DNS & Activate at any time. DNS changes typically take a few minutes to propagate, though some providers may take longer. The plugin will keep you updated as it detects each record.
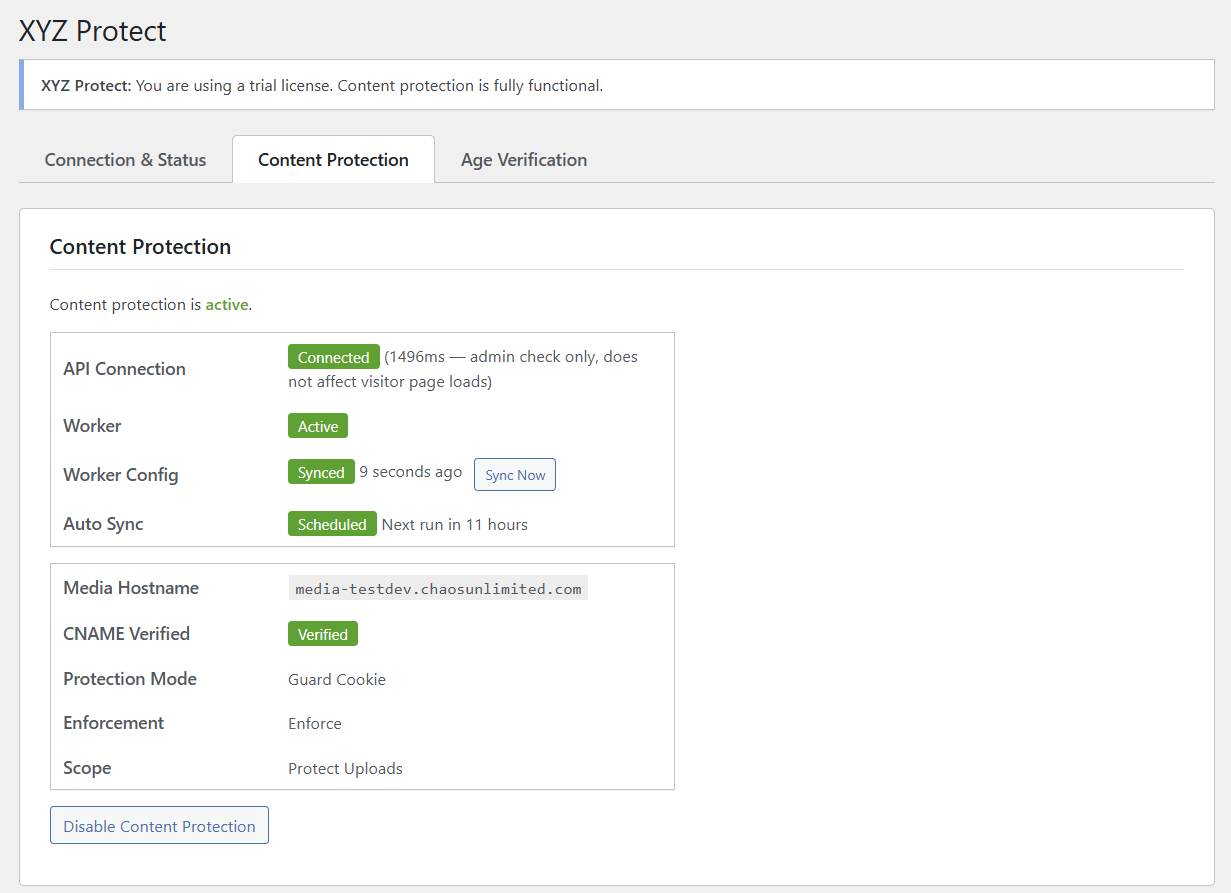
Once all three records are detected and the SSL certificate is issued, content protection activates. You'll see a status dashboard showing the API connection, Worker status, configuration sync, and your current protection settings.
Configure Protection Settings
With the media network active, scroll down to the Protection Settings section to configure how your content is protected.
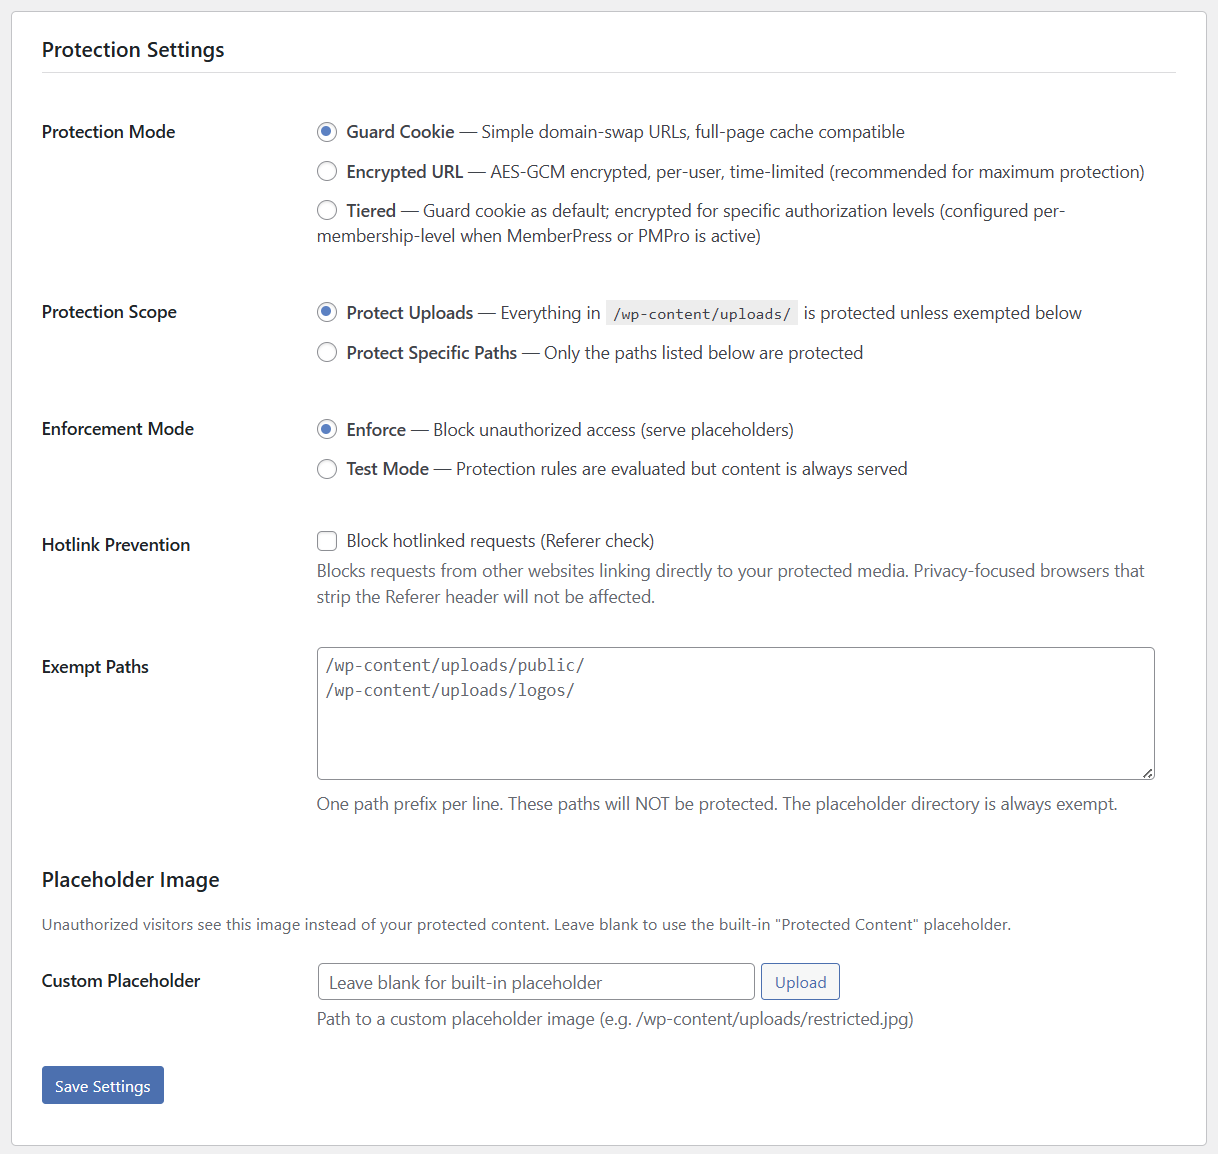
Protection Mode
Guard Cookie is the default mode. When a visitor logs in (or is otherwise authorized), their browser receives a signed cookie. The plugin rewrites all media URLs from your WordPress domain to your media subdomain. The Cloudflare Worker checks for this cookie on every media request — if it's present and valid, the real file is served. If not, a placeholder is returned. Guard Cookie mode is compatible with full-page caching plugins.
Encrypted URL provides stronger protection. Instead of simple domain-swapped URLs, the plugin encrypts each media URL with AES-GCM encryption that is bound to the specific user's session and expires on a time window. Real filenames are never exposed in the page source, and sharing a URL with another person won't work — the URL is tied to the original visitor's session. Encrypted URL mode is recommended for maximum protection.
Tiered mode combines both: Guard Cookie is the default for general visitors, with Encrypted URL applied at specific membership levels. Tiered mode requires an active membership plugin — currently MemberPress and Paid Memberships Pro are supported. If you'd like support for your preferred membership plugin, let us know.
Protection Scope
Protect Uploads (default) protects everything in /wp-content/uploads/ unless you've added paths to the Exempt Paths list. This is the simplest option — enable it and all your media is protected.
Protect Specific Paths takes the opposite approach: nothing is protected unless you explicitly list the directory paths that should be.
Enforcement Mode
Enforce is the production setting — unauthorized requests receive a placeholder image instead of the real content.
Test Mode evaluates all protection rules but always serves the real content. Use this during initial setup to verify that URLs are being rewritten correctly without risking broken images on your live site.
Hotlink Prevention
Enable this option to block requests from other websites that link directly to your protected media (referer check). Privacy-focused browsers that strip the Referer header will not be affected — they'll still be authorized normally via cookies.
Exempt Paths
Enter directory path prefixes (one per line) for content that should remain publicly accessible. For example, you might exempt /wp-content/uploads/public/ for site logos and thumbnails, or /wp-content/uploads/logos/ for branding assets. The placeholder directory is always exempt automatically.
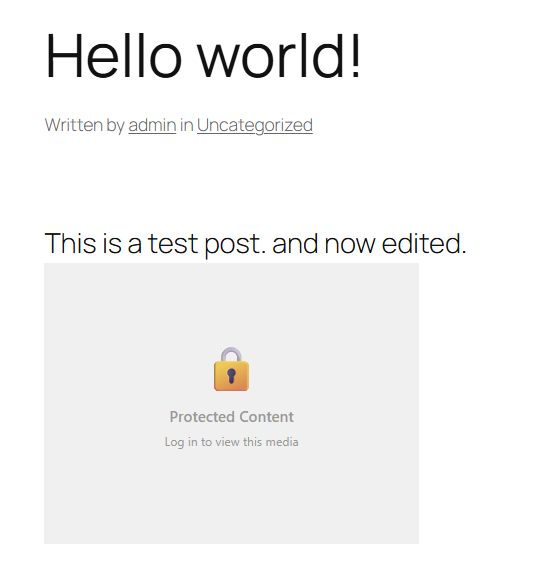
Placeholder Image
When an unauthorized visitor requests a protected file, they see a placeholder image instead. The built-in default looks like this:
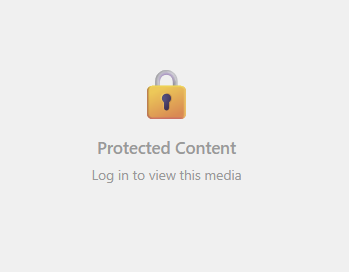
You can upload your own custom placeholder image if you'd like branded messaging — for example, "Subscribe to view this content" or "Members only." Leave the Custom Placeholder field blank to use the built-in default.
Click Save Settings to push your configuration to the protection network.
Content Organization
If you're adding XYZ Protect to a site that has been online for a while, your media files in /wp-content/uploads/ may already be indexed by search engines. The Content Organization section in the plugin provides guidance on organizing your uploads directory and optionally relocating it so that old direct URLs no longer resolve.

This migration is optional — XYZ Protect works without it. But for maximum protection on established sites, it ensures that previously-public direct URLs return a 404 instead of serving the file. For detailed instructions, see XYZ Protect Content Organization Best Practices.
MU-Plugin (Optional but Recommended)
Back in the Advanced section at the bottom of the Content Protection tab, you'll see the option to install the MU-Plugin (Must-Use Plugin).
The MU-plugin ensures that XYZ Protect's media URL rewriter executes as one of the last steps in preparing a page's HTML. This makes it compatible with image optimization plugins (like ShortPixel, EWWW, Imagify, and Smush) and other plugins that modify URLs or HTML during page rendering. Without it, an optimization plugin might process the page after XYZ Protect has rewritten URLs, potentially undoing the rewrite.
Check the "Install MU-plugin for enhanced compatibility" box and the plugin will install it automatically. Some hosting environments restrict creating new folders in /wp-content/. If the automatic installation fails, you'll need to manually create the /wp-content/mu-plugins/ directory on your server and copy the xyz-protect-buffer.php file from /wp-content/plugins/xyz-protect/mu-plugin/ into it.
If you're not using any image optimization or HTML-transforming plugins, you can skip this step and only enable it later if you find that media URLs aren't being rewritten to the protected media hostname.
Authorization Module
The Authorization Module section shows which method XYZ Protect is using to determine whether a visitor is authorized to view protected content.
On a standard WordPress installation without a membership plugin, this will show WordPress Login — meaning any logged-in WordPress user is authorized to view protected media.
If you have MemberPress or Paid Memberships Pro installed, XYZ Protect automatically detects them and adjusts authorization accordingly. Membership plugin configuration is covered in separate guides.
Run the Self-Test
Click the Run Self-Test button to verify that the protection network is working correctly. The self-test requests a protected media URL via your media subdomain without the authorization cookie and confirms that the Worker returns an HTTP 403 (blocked) response instead of the actual file.
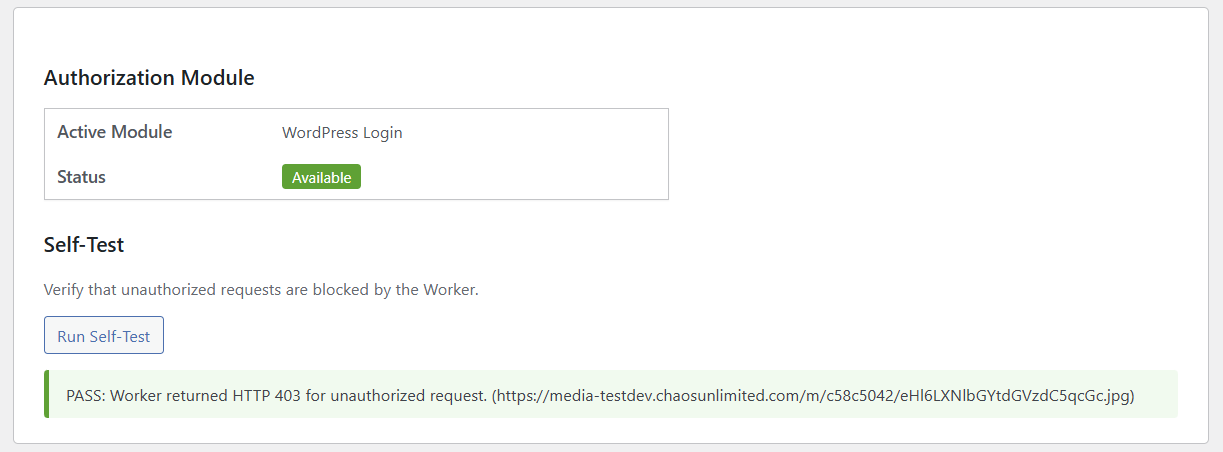
A passing self-test confirms that unauthorized visitors will see placeholder images instead of your real content.
Verify It's Working
Open an incognito/private browser window (which won't have your WordPress login cookies) and navigate to a post or page on your site that contains images. You should see the placeholder image in place of every protected media file.
If you view the HTML source of the page, you'll notice that image URLs now point to your protected media hostname with obfuscated paths. For example, a Guard Cookie-protected image URL looks like this:
https://media.yoursite.com/m/c58c5042/MjAyNi8wNC9EU0M5NDUyLTItMzAweDI4NA.jpgThe original filename and directory structure are replaced with an encoded path on the media subdomain. The real file location on your server is never exposed to the visitor's browser.
With Encrypted URL mode, the URLs go further — each one is a unique AES-GCM encrypted token bound to the visitor's session:
https://media.yoursite.com/xyz/wvdURE60Qoq8RULAPVesa-qYVnM1HhQvdo9YPYNq...jpgThese URLs are per-user and time-limited. Sharing them with someone else or accessing them after the time window expires returns a 403.
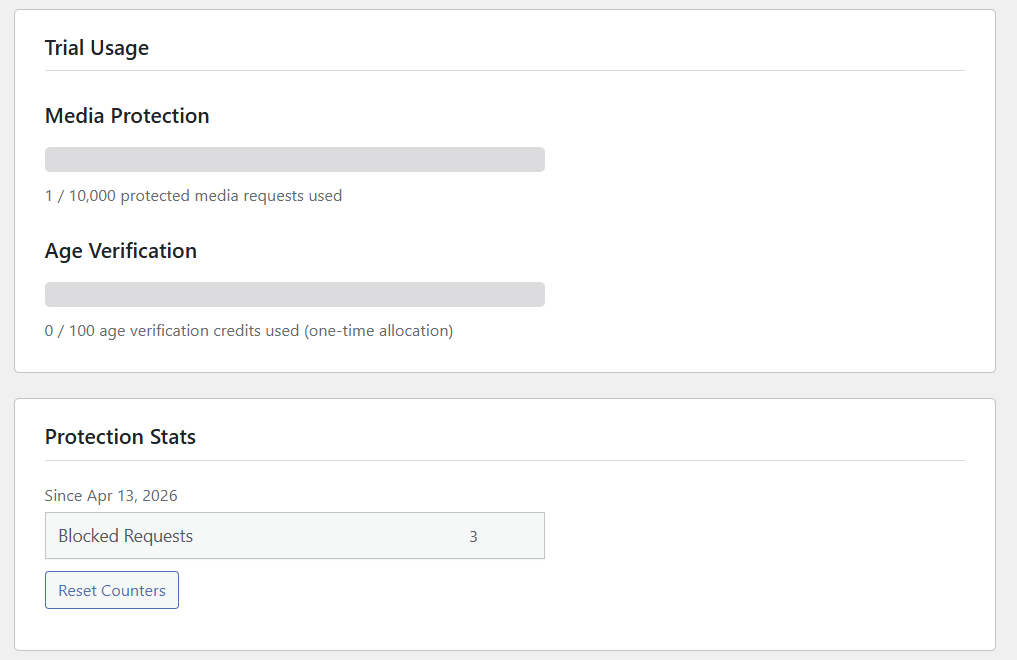
Trial Usage and Stats
On the Connection & Status tab, the Trial Usage section shows how many of your 10,000 free protected media requests have been used. Each time the Worker processes a valid media request on your media subdomain it counts as one protected media request.
The Protection Stats section tracks how many unauthorized requests have been blocked since activation. This gives you a clear picture of how much unauthorized access XYZ Protect is preventing.
Next Steps
With media protection active, your content is now served exclusively through XYZ's secure delivery network. Logged-in users see your media as normal; everyone else sees placeholders.
From here, you might want to:
- Explore Encrypted URL mode for stronger per-user, time-limited protection
- Set up membership-based tiers with MemberPress or Paid Memberships Pro for granular access control
- Configure age verification if your site serves age-restricted content covered in a separate guide
- Upload a custom placeholder image that matches your site's branding and messaging
For questions or support, visit support.xyzinc.com.